Showing posts with label sculpture. Show all posts

Monday, January 12, 2015

Happy New Year!

I hope you had a wonderful holiday season and a delightful New Year!

It has been very busy over the last several weeks, but as things begin to calm down and the weather turns gloomy here...I am able to sit more and more at my craft table to focus.

One project that I had a great deal of fun creating were these racing pigeons:


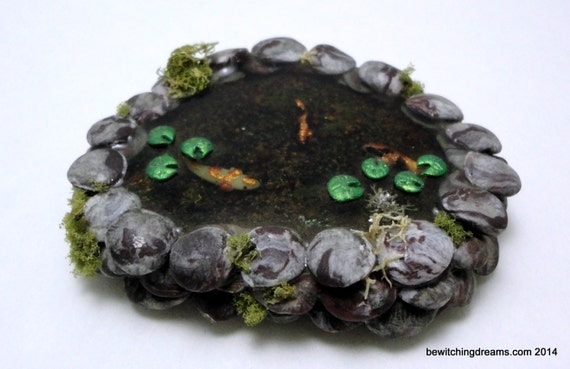
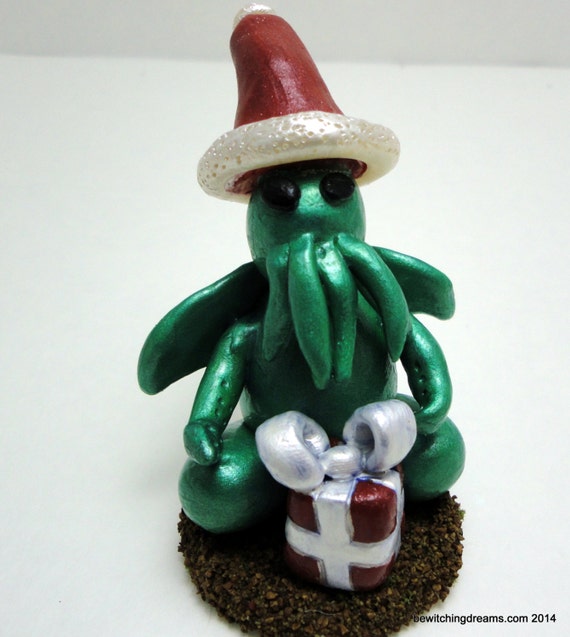
During the holidays, two of my other creations found new homes!  My Itty Bitty Santa Cthulhu and my miniature Koi Pond both traveled to their new owners.  I am so thrilled that they arrived safely!


I am trying out a few new techniques, at the suggestion of my fellow polymer clay artists.  So far, I am liking the effects, but you will have to stay tuned to see what those changes will be!


Saturday, August 16, 2014

A Day Full of Love

This summer has been full of ups and downs.  There have been plenty of scares, but we are still holding on and moving forward.  Sometimes, our path leads in a different direction.  Perhaps one that we did not anticipate or expect, but we still continue onward, waiting to see what is around the next corner.

In the meantime, I have been working on a major project over the last month.  We just came home from a beautiful wedding of two of our dearest friends.  It was such a happy occasion and everyone was bursting with joy for the couple.


At the beginning of the summer, the bride approached me about making a bride & groom sculpture for the occasion.  She gave me plenty of notice, so I had no problem planning out the project.  Many sketches and redesigns later, I give you the Happy Cthulhu Couple!


This was the first time that I had to fix a standing figure with legs into the base.  This was a challenge, but I am more confident than ever in moving forward with these types of sculptures, due to the structural integrity that I was able to master.


I bugged the bride and groom for as many details about their wedding day as possible, so I could match the color of the bouquet, the style of wedding dress, the groom's suit and boutonniere.  I made cherry blossoms, to match the design of their wedding cake.


I added a few Swarovski crystals to the train of the dress to add a bit more flare and sparkle.  


Oh, and speaking of the wedding cake.  You have got to check this out!  Made by my friend, Mike, over at Baking Better.  If you have not checked out his blog, you must for some of the best dessert recipes around!


Seriously, the best wedding cake I have ever tasted.  Ever.

And a big Congratulations to the happy couple!  It was a beautiful wedding, full of love and joy!  We are all so happy for them and it was the loveliest wedding that I've ever attended.

Saturday, April 26, 2014

Exciting Things Are Happening...

Things have been so hectic lately, I have barely had time to keep my head straight!  My day job has kept me on my toes, with training new personnel, helping with projects and trying to finish up my own.  My SO and I also just celebrated our tenth anniversary this past week. Appropriately enough, part of it was in the local craft store, picking up new supplies. :)

If you have "Liked" my Facebook Page, then you will have seen some big developments occurring in the world of Bewitching Dreams.  If not, then I'll give you a quick rundown! :)

Located in Cary, NC, The Gamer's Armory is an awesome game store that has been very supportive of the local gaming community.  The owners are amazing people and I was honored when they reached out to me a few weeks ago to inquire about my little Itty Bitty Cthulhu sculptures! They carry several local artists and were looking to expand their selection of gaming/geekery items.  I was thrilled to receive the email and met with the owners to show them some of my latest creations.


First, I had to show off the Sentimental Cthulhu....Cthulhu has a softer side.  He enjoys stopping to smell the roses...before eating them.  


(Psst!  This was my first attempt ever at making roses...I had a lot of fun with them!)

Then, I wanted to show the Gamer Cthulhu.  You just know that he's screaming all sorts of insanity-inducing expletives over his gaming headset, don't you?


Then, there is the Romantic Cthulhu.  Cthulhu has a heart...truly...it might not be his own, but he is still presenting you with it. Aww...so romantic...and messy.


Then, there is Cthulhu...holding a brain.  Because, why shouldn't he? Where does the yummy soul lie....in the heart, or in the brain?  That is the true question...and the true connoisseur that Cthulhu is, has to try both to find out.


Which is your favorite?  If you are in North Carolina, stop by The Gamer's Armory to see some of my work, along with other great artists and check out the wonderful gaming groups that meet up there on a regular basis! They have a wonderful selection of miniatures, tabletop, card games and more!

Edit: After much deliberation, my friend ColtPixy helped me narrow down a name for these guys! Thank you so much!  I love my Itty Bitty Cthulhu!

Monday, November 18, 2013

Autumn Moves Swiftly...

And pretty soon, the winter holidays will be here!  Only a few weeks ago, our State Fair was ramping up and Halloween was quickly approaching!

Before starting my normal entries for the state fair, I had to finish up a request from a friend for a Witchy Cthulhu!  She had seen my versions at the PPD fair and asked if I could make her one.  I decided to go a bit further with this little fellow and not only give him a cauldron, but also a broom!


I entered five entries for the state fair.  With so many things going on, I entered pieces that I had made in the last few months, such as Easter Cthulhu, orca scrimshaw inspired magnet and my mini peacocks.  

I also wanted to enter the two egg competitions...one has to be based on the theme of the state fair, the other is open to any style.

For the open category, I made another peacock, this time, sitting on a painted, hollowed egg that is intertwined with ivy.


The theme for this year was "Homecoming."  I thought on this idea for weeks...started a few projects and then quickly dismissed them.  I even went so far as cutting up an egg and baking, but I set it aside for a Military Homecoming Theme.


It is supposed to be representative of the tradition of tying a yellow ribbon "around the old oak tree."  I remember during the first Gulf War, how popular of a sign this was in many yards.


The only entry that won a ribbon was my mini peacock sculpture.  Not only did it win First Place in the Miniatures Division, but it also won Best in Show!!! I was so shocked and thrilled.

The State Fair is one of my favorite events in the fall.  It's a great time to get outside, enjoy the cool weather and see some wonderful exhibits.  We don't ride the rides nor do we eat much of the fair food, but we love to people watch and play horrible carnival games!  To be able to walk around and see so many talented artists and crafters is such a thrill.  I'm already making plans for next year's fair.

Sunday, September 15, 2013

Busy Busy Busy!

Another weekend has finally come to a close and I have been frantically working on several projects, both for the Central NC Pagan Pride Days Festival, as well as for home and work!

One of the projects that I worked on this weekend was a large assortment of magnets.  I had a lot of fun creating these and will probably try my hand at a few more before the end of the week.


Butterflies, dragons and unicorns, oh my!


Celtic crosses


My pumpkin Cthulhu was also finished this weekend.  All he needs is a pumpkin chai latte and he would be the perfect fall accessory! 

Check back later this week to see more of my creations, specifically some earrings that I finished or you can follow me on Facebook to see more of my WIP (work-in-progress) pictures and sneak peeks at finished projects.  

Wednesday, September 11, 2013

Double, double toil and trouble..

I have been working diligently on several projects, because I am getting ready for my first ever festival!  I would be more nervous, but I'm running around in circles so much, that I really have not had the time to worry about anything but my next project.

Speaking of, here are some of my finished pieces.


Double, double toil and trouble;
    Fire burn, and caldron bubble.

These little witchy Cthulhus don't seem to be getting into any mischief, do they?  Nah, I didn't think so either...though, maybe I shouldn't leave them together to plot in the darkness of night.


The top fellow there, with the bubbling caldron and purple hat...will be donated as a raffle item at the Central North Carolina Pagan Pride Days Festival.  If you are in the area, come check out some of the amazing vendors and folks that will be participating at this weekend event!


Sunday, August 25, 2013

Painting of All Types

I showed you one of my works in progress earlier this week.  Well, these peacocks have received their colors, like their larger cousins, now living in their new home with the happy couple married today!

That is not the only painting that I've been doing recently.  If you follow my Facebook page, you will see earlier today, I finished painting one of my displays for the upcoming craft fair.  What do you think?  A little while ago, I busted out laughing as I realized that I was looking at a very warped version of Hollywood Squares, featuring the multiple personalities of Cthulhu!

I need sleep. I realize this too.


Tuesday, August 20, 2013

Mini Peacocks

Have I bored you enough with peacocks yet?  Well, that's too bad, because I have another peacock project to share with you.

Here are some mini peacocks that I made the other day. They were just baked tonight and will be painted tomorrow.  They can sit on the end of your finger!

Monday, August 19, 2013

The final touches...

And here, the peacocks begin getting their final touches...layering of paint to bring details to life.  The tails and back of the body were first...using a beautiful green-gold metallic paint to bring forward all of the detail work.


The front and heads were painted with a glorious sapphire blue, which I stole off of my boyfriend's miniatures work table.


I finished the details off with pearl white and a metallic black, enhancing the face along the way and adding definition.


The wings were painted white, then washed over with a thin metallic black to make the details really pop, while allowing the natural blue to shine through as well.

The final touch for the tails included placing Swarovski crystals in the eyespots of the final row of tail feathers.  This really added an extra dimension and I'll give credit where credit is due...it was entirely my boyfriend's idea and suggestion.  He was right, it really gave the sculpture that extra pop of color.


Their large base was covered with clay, baked and then painted in a mixtures of browns, greens and taupe. This cannot be seen, but I know it is there and it added depth to the ballast, which was added next. Following the addition of the ballast was green moss and grass, carefully glued into place to create a natural scene for the peacocks to roost.


Here they are at the wedding shower. :)  They do not look as brilliant of a blue under the natural light, but I will share my friend's photo once more, which really captured the colors nicely.


Saturday, August 17, 2013

Finally Looking Like Peacocks...

After getting the texturing in the tail feathers down and the basic shape of the wings and back feathers, the next day, I started the task of filling in all of the details.  Each tail took me a little over an hour to complete all of the feathering detail.  Thankfully, the bodies and wings did not take as long...I think I averaged about forty minutes per sculpture.


I really had fun creating these textures...it was tedious, but very rewarding as I saw an abstract design become more and more refined with each detail that was added.


Standing side-by-side, these peacocks are finally looking like they should.  If you've noticed, they were promoted to a bigger base.  The one I started with was about half this size and could not accommodate both birds and their gorgeous fan tails, so I had to find one that would work properly.  


A close-up of the wings and body detail.


The final step for these guys was to make their head feathers and bake them all together.  Here's a closeup of the head after baking.


Come back soon to see the painting that went into these fellows, along with the details in the base.

Thursday, August 15, 2013

The Peacocks Continue to Flourish...

When we last left off, the peacocks were just starting to plump up.  They had grown wings, a tail and were definitely starting to look more like birds and less like scarecrows.


I took nearly two weeks away from the peacocks, debating on what I would do next with them.  When I started to work on them some more, their tails developed nicely...well, except for the one on the left.


Oh, how I disliked that first tail.  I looked at the pictures again and again after I went to bed, nearly going back downstairs at 4am to work on it some more.  I forced myself to take a break from it, though...and tackle it again the next day.

This definitely worked to my advantage.  Had I gone with my first inclination, I might have redone the entire tail, but I figured out how to trim off the bottom layer and re-shape it to my liking.  Then, the real fun began!


Here, you can see the tail on the right has been textured with feather detail.  The one on the left, having been reshaped, is untextured, besides having the 'eyes' of the feathers put into place.


Both tails are now fully textured, as are the bodies of the peacocks, if you look closely.  If you do not look so closely, you will see my poor Cthulhus, lying painted and abandoned, ready to be given toys to play with. Soon, my little ones, soon.


In this image, (ignoring the glare of the Cthulhu), you can see the wing and body details that have started to develop on both birds.  Check back as these peacocks gain all of their feathers and their head feathers too!